Wednesday, August 31, 2016
CRAFT ALLOWANCE
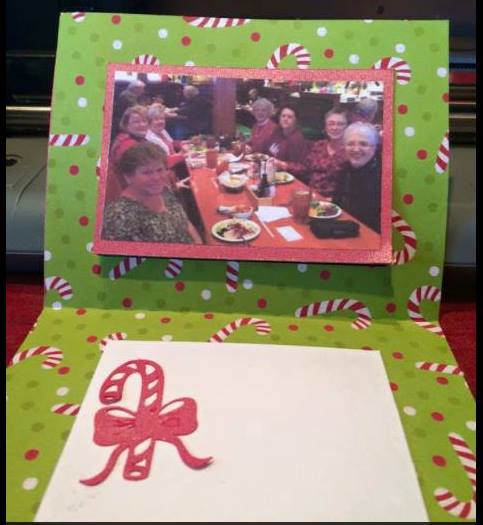
We have budgeted an allowance for crafts each month! I had a little fun with this photo from a trip to Loon Mountain when we lived-in New England!
Thursday, June 16, 2016
FAUX TEXTURED METALIC TECHNIQUE
This technique is inspired by Jennifer McGuire. Here is the link to her tutorial:
FAUX METAL TECHNIQUE
1 - Tape your card base or a piece of card stock onto a mat or paper
2 - Apply ink with an applicator (You can use one or as many colors as you wish)
3 - Select the color of Perfect Pearls you wish to use. Apply on with brush. (A little goes a long way.)
4. Wipe the area with a cloth either before or after removing tape.
5. To set Perfect Pearls – spritz water in air and wave card through the area you spritzed.
6. Place card base or card piece into embossing folder and run through the embossing machine. 7. If using a card piece, adhere card piece to card base and embellish as desired.
CLICK ON THIS LINK TO A DROPBOX FOLDER TO DOWNLOAD THE INSTRUCTIONS:
FAUX METAL TECHNIQUE PDF INSTRUCTIONS
MORE TO COME - IMAGES OF CARDS DESIGNED BY LADIES THAT COME TO THE NOOK!
And here is another metallic technique, we will have to try!
Here is the tutorial for the stamping technique:
FAUX METALLIC STAMPING!
1 - Tape your card base or a piece of card stock onto a mat or paper
2 - Apply ink with an applicator (You can use one or as many colors as you wish)
3 - Select the color of Perfect Pearls you wish to use. Apply on with brush. (A little goes a long way.)
4. Wipe the area with a cloth either before or after removing tape.
5. To set Perfect Pearls – spritz water in air and wave card through the area you spritzed.
6. Place card base or card piece into embossing folder and run through the embossing machine. 7. If using a card piece, adhere card piece to card base and embellish as desired.
CLICK ON THIS LINK TO A DROPBOX FOLDER TO DOWNLOAD THE INSTRUCTIONS:
FAUX METAL TECHNIQUE PDF INSTRUCTIONS
MORE TO COME - IMAGES OF CARDS DESIGNED BY LADIES THAT COME TO THE NOOK!
And here is another metallic technique, we will have to try!
Here is the tutorial for the stamping technique:
FAUX METALLIC STAMPING!
Friday, April 8, 2016
FLOWER POT CARDS
FLOWER POT CARD INSTRUCTIONS
Card base:
9 x 3.5 card stock
Score at 2 and 5.5 (Fold mountain/valley)
Can trim base to so it angles (see images
above)
Border punch edge of folded flap (optional)
Can sponge base edges with color, if desired.
Can add patterned paper if desired to front of
pot
Tie ribbon around card to keep it closed. No
adhesive needed
Insert:
4.5 x 2.5 colored card stock
4.25 c 2.25 white or ivory card stock
Adhere together
Cut small strip from same as base and adhere
to insert towards bottom, if desired.
Stamp sentiment if desired a few inches from
top and can stamp off an image over sentiment too, if desired
Adhere flowers, leaves, branches to insert at
top
Dimensionals can be used
Can create a sentiment embellishment to front
of card pot
FLOWER POT CARD
INSTRUCTIONS
Card base:
9 x 3.5 card stock
Score at 3.5 and 7.5 (Fold mountain/valley)
Can trim base to so it angles (See video
regarding creating a template)
Border punch edge of folded flap (optional)
Tie ribbon around card to keep it closed. No
adhesive needed/
Insert:
4.5 x 2.5 colored card stock
4.25 x 2.25 white or ivory card stock
Adhere together
Put 2 strips of adhesive at top of insert
where you will adhere flowers
(To make sure it will
fit into an A2 card – place a piece of 4.25 x 5.5 paper (as a template under
pot as you put card together.
Adhere flowers, leaves, branches to top of insert.
CLICK HERE: A SIMILAR FLOWER POT CARD TUTORIAL
These are cards created by me and by others in my Nook!
Thursday, April 7, 2016
SPECIAL EVENT CARDS - CREATED BY THE "NOOK AND GRANNIES"
Sometimes we refer to ourselves as the "Nook and Grannies". A lovely teen who came to the Nook with her Mom came up with that reference! (Hmmmm why am I suddenly hungry for a Thomas English muffin?!?
I desire for the Nook to touch a lot of lives. I encourage the ladies to continually invite new ladies to the Nook. I don't want us to be "ingrown" but to reach out to others.
Another way that we reach out to others is to send cards for special events or needs.
The birthday cards below were created by ladies in the Nook and sent to Jacob Abedini when his father, Pastor Saeed Abedini, was in prison in Iran for over 3 years. They were sent to Jacob to cheer him up on his 7th birthday.
This is a close up of the card. (above)
These are the cards we sent!
LASTING HEARTS
Lasting Hearts is here to help comfort mothers who have lost
a piece of their heart. Losing a child, whether in pregnancy
or older, can be one of the hardest pains a parent can endure.
Cards are sent to accompany a book that is given to the parent(s).
See more at the link below.
This link tells about the campaign:
These are the cards closeup.
We also created these cards. Check the link below to learn more about them.
Subscribe to:
Posts (Atom)